
Burlap seems to be everywhere now a days: Christmas trees, wreaths, pillows, curtains, flowers, baskets…you name it! It’s funny because not so long ago, it was a last resort itchy fabric used for Indian and scare crow costumes! Burlap and linen canvases are attention magnets on their own, their natural color and texture requires very little done to add elegance to any home or office decor. The problem is that -as all things “new”- they are a little over priced, provided that you keep in mind that you are buying burlap not silk!
Online you will find advertisements for burlap canvas ranging from $0.79 to even $1.09 on Clearance. Great right?! But don’t be fooled, the all say “Available in Store Only”, and there is no such thing in the store; is more like $5.99 for a single 5×7 burlap canvas vs $4.99 for a pack of two white stretch canvas of the same size. It gets worse when it comes to linen canvases: $8.99 for a single canvas of the same size! Remember, we are talking about one single, non professional grade canvas. I’m not cheap, I just value my money and I’ll pay the set price for a professional grade canvas for my paintings, but some craft projects don’t need a $25 canvas if you get what I mean! So, what can we do?!
We can wait for those wonderful 50% off a regular price item + 20% off your entire purchase coupons we love so much, or we can make our own! Here’s how:
MATERIALS:
- Laminated burlap roll
Laminated burlap has a thin plastic coating on the back that makes it a little more stiff. It’s perfect for printing purposes and is more durable. If you cant find it, no worries, buy a yard of regular burlap and some Freezer Paper, follow this simple tutorial and you will have laminated burlap of any size for any use!

- Wood frame
You can either build a frame using a 1×2″ board, or simply buy an unfinished wood frame at your local craft store. Your frame should be a simple “wood” (basswood or pine) frame. Plastic, metal or pressed wood frames will not work for this purpose and it would be a waste to use a decorative frame since you will be covering it.
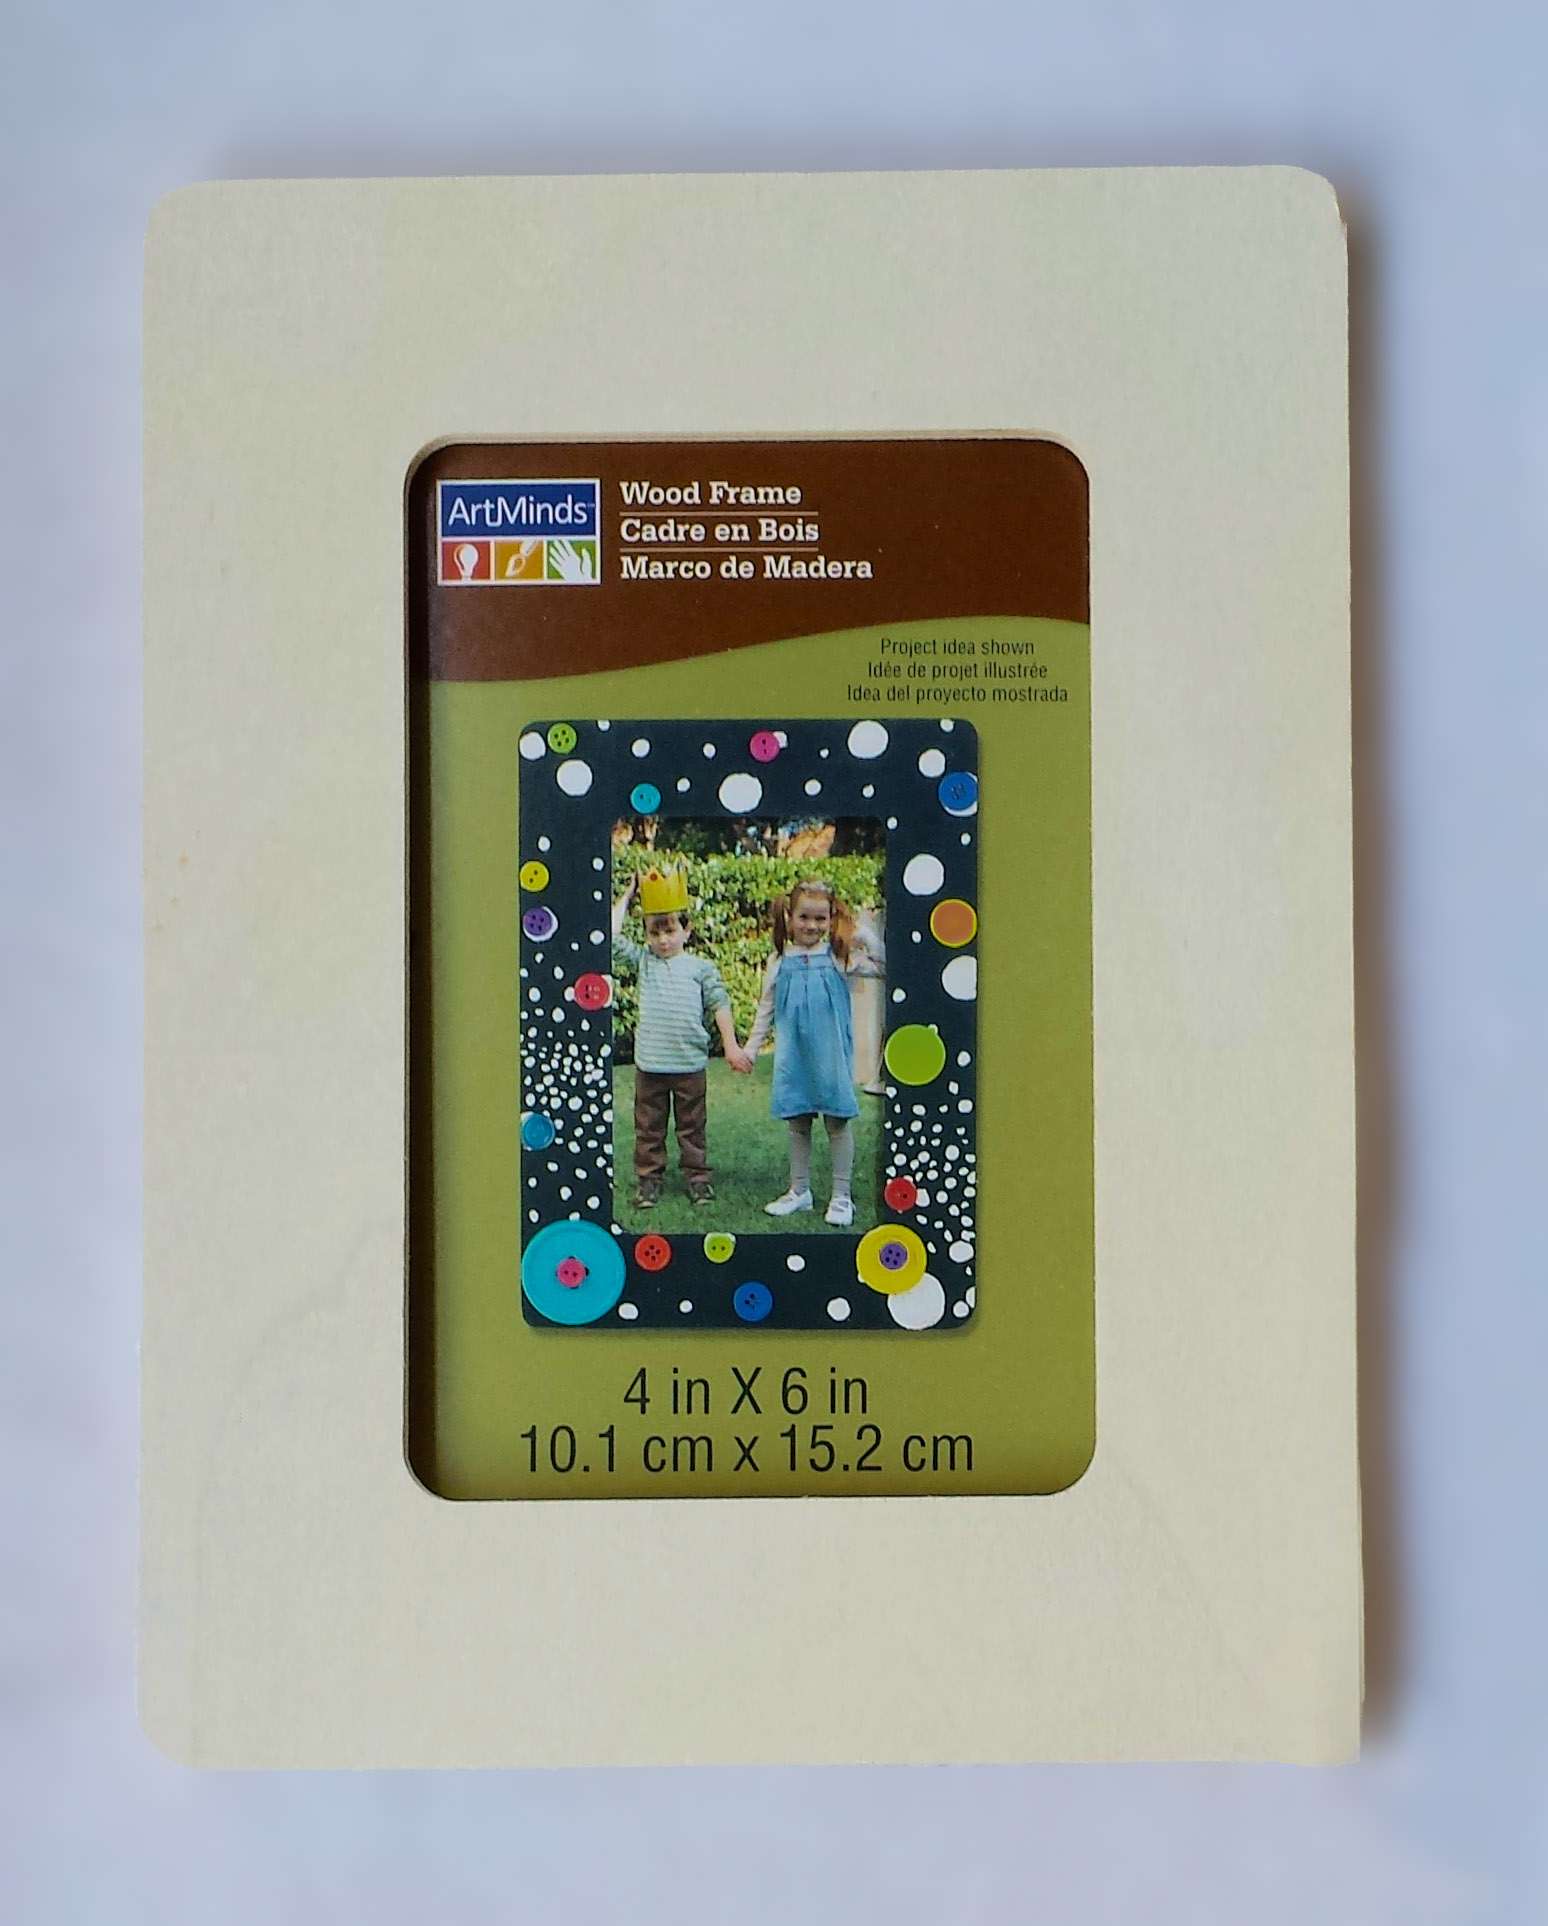
Cost: $1.00
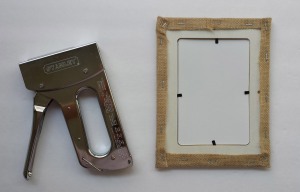
- Staple gun
Make sure your staples are not longer than the width of your wood, you wouldn’t want them showing up on the opposite side of your frame! A regular office stapler is not strong enough for this project.
- Glue
I used wood glue, but if you’d like you can use any strong glue. Remember you are working with a thick fabric that doesn’t absorb the glue as easy, regular craft glue might not be strong enough to hold it down.
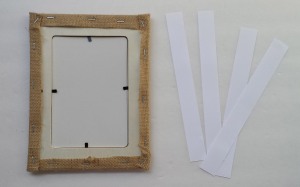
- White Cardstock
Covering the back of your new canvas is optional. If your edges are perfectly trimmed you can leave it as is.
INSTRUCTIONS:
- First cut a piece of burlap big enough to cover your frame. Leave enough room to fold the burlap over the back of the frame, you can trim excess later.
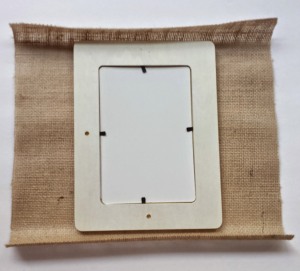
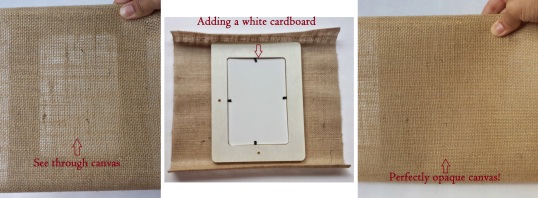
- Remove the cardboard piece from your frame, you don’t want a strangers face showing through your work! You could leave it off, but you’ll notice that you can see through the canvas, if that is not a problem continue to step 3. Use a piece of white cardboard instead, that way your canvas will look better front and back.
- Now is time to staple the burlap. Make sure it is as straight as possible, you can see a cricket burlap canvas long before you can see the artwork on it! Staple on side first, stretch it as much as possible and staple the opposite side. You have to make sure your canvas is stretch before stapling.
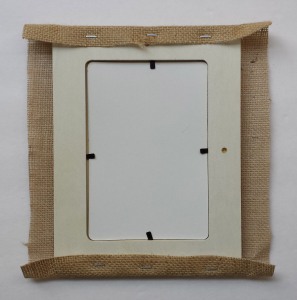
- Once you are done with that side fold the corners nicely and stretch and staple the other side. Do one side at a time; stretch then staple.
- Trim any excess. It’s ok if you have areas that are not 100% perfect, you can always cover them up.
- When covering the back of your canvas you have two choices: partial or full coverage. I went for the partial coverage with the purpose of making it easier to hang. I just cut 4 even strips of white cardstock and glued them. Half of my strip cover the burlap and the other half the frame, that way it not only looks good but it secures the burlap ends.
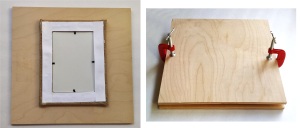
- In order for the cardstock to dry flat (not buckled) I put the canvas in a home-made book binding press and left it for about an hour (that’s how long the wood glue needs to bind). Then I removed it and left it to completely dry over night. You can use anything from heavy books to a couple of wine bottles to keep it pressed, the heavier the better.


That’s it! A home-made burlap canvas that cost only $2.46 and I still have enough burlap left to make 2-3 more canvases depending on the size!

You can use this technique to create all sort of fabric or linen canvases, so next time you see a piece of fabric with an awesome print, make a frame and hang it! This is my canvas put to use:

Have fun! See you next week!

